Mounting |
| | Home | User Manual | HERO6 | |
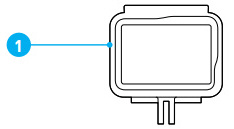
1. The Frame
THE FRAME The Frame (for HERO6 Black/HERO5 Black) provides additional protection for your camera if you drop it, so you might want to keep it in The Frame during certain activities, even if the camera is not mounted.
HERO6 Black is waterproof to 33’ (10m) with the doors closed — no additional housing is needed when using the camera in or around water.
NOTICE: The Frame does not provide additional waterproof protection.
PRO TIP: During water activities, use a camera tether for added security and use a Floaty to keep your camera afloat (both sold separately). For more information, visit gopro.com.
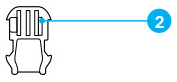
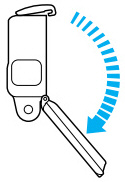
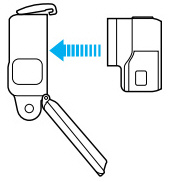
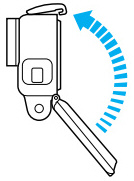
ATTACHING YOUR CAMERA TO MOUNTS To attach your camera to a mount, you need The Frame (for HERO6 Black/HERO5 Black) and a mounting buckle and/or thumb screw, depending on the mount you are using. 1. Secure the camera in The Frame:
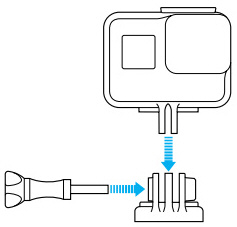
2. Attach The Frame to the mounting buckle.
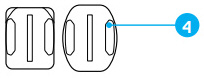
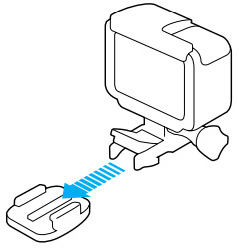
3. Follow the Mounting Guidelines to attach an adhesive mount to a surface. 4. Attach the mounting buckle to the mount:
PRO TIP: If you mount your HERO6 Black upside down, the camera automatically changes the orientation of your image to be right-side up. For more information, see Auto-Rotation (page 24).
MOUNTING GUIDELINES Follow these guidelines when attaching adhesive mounts to curved and flat surfaces of helmets, vehicles, and gear: • Attach the adhesive mounts at least 24 hours before use. |
 | The Temperature icon appears on the camera status screen when the camera becomes too hot and needs to cool down. Simply let it sit and cool before attempting to use it again. Your camera was designed to identify conditions of overheating and shuts down when needed. |
| For more information about mounts, visit gopro.com. |
| WARNING: If using your camera with a GoPro mount or strap intended for use with a helmet, always select a helmet that meets the applicable safety standard.
Choose the right helmet for your particular sport or activity and make sure that it is the right fit and size for you. Inspect your helmet to ensure that it is in good condition, and follow the helmet manufacturer’s instructions on safe helmet use.
Any helmet that has sustained a major impact should be replaced. No helmet can protect against injury in every accident. |
![]() ●
● ![]()
| • GPS GF-07 • A9 Wi-Fi mini DV • SQ11 Wi-Fi mini DV • SQ11 mini DV • GPS TK905 • XD Wi-Fi mini DV • GPS Mini A8 • Q7 Wi-Fi mini DV • GPS GF-09 • HERO6 • |
| hero6 black |
|---|
| © «Org-Info.Mobi» |