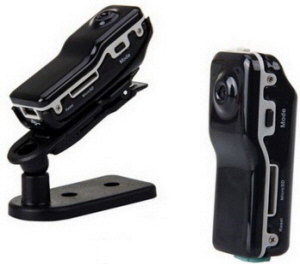
1. Introduction
This Mini DV is a high-definition video recorder with simple operation
or sound control, elegant design, small size, it is easy to carry. It is
an essential utility in business, education, security, media, justice, tourism,
health care, living and other field
2. Operation Guide
Charge
The battery is built-in lithium rechargeable battery, so when you use it
the first time, please charge firstly The method for charging as following:
• Connect computer: use USB cable to connect the computer, then it can be
charged.
• Use adaptor connect charger plug with USB cable, then plug into electrical
connector receptacle, it can be charged.
When you charge it, green light and red light will bright simultaneously,
of which states are stillness.
Notice
when battery power is not enough, D001 will enter into protection mode,
so it cannot be turn on Now, please charge for it
3. Power on to video
Press Power button slightly, yellow indicator light begins to bright, now
it enters into startup ready mode, which can enter into standby mode quickly.
Press Record Stop button slightly, yellow indicator light begins to bright,
red indicator light starts to flash slowly. At this time, it begins to make
a video. The resolution for video file is 720*480, and frame number is 29--30
fps/S. Then short press Record / Stop button, video is stopped and saved
automatically. After saving the red indicator light remains light. If you
need to continue to video, please press Record / Stop button slightly once
more.
Notice:
• Please make sure T-flash (Micro SD) card has been inserted, if not, it
will be power off automatically after 30 seconds.
• The maximum capacity of T-flash card is 16GB.
• Saving file needs certain time, so please don't press Operation button
continuously in order to avoid saving unsmoothly and generating incomplete
file.
• When you make a video, please focus on the object and keep 50cm under
sufficient illumination. Then the video will be right, natural color, clear
and stable.
4. Sound control video (optional)
Press Power button slightly, yellow indicator light begins to bright, now
it enters into startup ready mode, which can enter into standby mode quickly.
At that Time, press MODE button slightly, and then you can switch into sound
control video mode. Now yellow indicator light always brights, red indicator
light flash quickly (indicate sound control standby mode) When decibel of
video is more than 60, then it will be video automatically. At the moment,
yellow indicator light always brights, red indicator light flash slowly.
(Indicate under sound control video)
When sound control starts, the shortest shoot time is 2 minutes. After 2
minutes, if there is no any sound, D001 will save file automatically and
switch into standby mode. If there still has sound after 2 minutes, D001
will continue to shoot.
5. Time set.
There is a CD with the product which contains a file named time synchronization
file. Please copy it to TF card. When connect D001 with computer, whose
time will be displayed with computer synchronously.
The detail as following:
• build a text called TAG.TXT under root directory of card.
• open TAG.TXT, write synchronous date according to enclosure strictly.
Details as following:
[date] need space with new line
2009/07/22 need space with new line
12: 00: 00
Power on the machine every time, system will check and analyse TAG.TXT,
then set system time according to file time. After that the text will be
deleted by system automatically.
6. Power off
Under video mode or standby mode, please long press Power button 3 seconds,
then release till indicator goes out Then the machine is turned off.
7. Auto-power off function
MINI DV will save file and turn off automatically as following:
• When you shoot video without enough power, file will be saved automatically,
then auto-power off.
• When disk space of MINI DV is not enough, after indicator goes out immediately,
file will be saved automatically then auto-power off.
• Under standby mode, without any operation in 45 seconds, it will be
auto-power off.
8. Connecting computer
It can connects computer under power off mode, standby mode or video
mode, after that which can be used as U disk, who can copy, cut and paste,
delete file.
When you connect it with USB port, a portable disk mark will be seen after
several seconds.
Red indicator light always brights, yellow indicator light will be from
flashed quickly to always brights.
Notice:
• When you connect computer, if the machine cannot be identified, or
not see the portable U disk mark in 30 seconds, please insert it again.
• It is better copy or cut video file into computer hardware then play.
Video file which is saved in the machine is played directly will cause unsmooth
play, the reason is that gigantic data cannot be transmitted synchronously.
9. PC Camera
When you first use PC camera, please install driver. The driver name
is SPCA1528_V2220_M...Setup.exe, which is placed in attached CD. When you
install please double press this document, and as per guide to do. After
that there will be an AMCAP icon on the computer desk.
Under power off or power on mode, use USB cable to connect computer,
the mode is U disk mode. Then short press MODE button, at this moment it
can be switched into PC camera mode. Then double press AMCAP icon can be
used as PC camera.
10. Reset
When machine works abnormal for illegal operation or other unknown reasons,
it needs to be reset.
The specific operation method as following:
Use slim pole to press the Reset button, and then finish one reset operation.
11. Notice
Suitable using situation: Please follow State's law. Do not use it
illegally.
Software upgrade: In order to make products have more function,
manufacturer will perfect product software continuously. This product is
convenient for customer to upgrade by themselves, so please contact with
local retailer for the latest software information and upgrade method.
Work temperature: Please use it under normal temperature and avoid
using under unsuitable body temperature.
Work humidity: Please use it under agreeable human atmosphere
humidity. Please not to make product wet or expose in rain for which without
waterproof function.
Shooting illumination: Please use it under enough light sources;
do not aim the camera at the sun and other strong light sources in order
not to damage optical parts of an apparatus.
Cleaning requirements: Please not use the product under too large
dust density atmosphere so as not to affect video effects for tainted lens
and other parts.
Waste treatment: Please pay attention to protect environment,
not to throw the product optionally. In order to avoid explosion, please
not throw product into fire.
Parameters
Video format: AVI
Video encoding: M-JPEG
Video resolution: 720*480 VGA
Video frame rate: 30fps ± 1 fps
Media playing software: Attached software of the operating system or
Mainstream audio and video media playing software, recommend Kmplayer
The ratio of image 4:3
Supporting system: Windows me/2000/xp/2003/vista; Mac OS 10.4
Charge pressure: DC-5V
Interface type: Mini 5 pin USB
Storage support: Micro SD (TF)
Battery type: high-capacity lithium polymer
Warning:
● Application: Please strictly abide relevant regulations and laws.
This product should not be used for any illegal purposes. The user is fully
responsible for its using purpose.
● Battery: If do not use this recording mode after long time, please
charge it fully before using.
● File security: This product is not a professional storage device.
It does not guarantee the integrity and security of saved files. Please
back up your important documents on the computer or other storage device
timely.
● Video quality: This product is not a professional video recording
device. It Does not guarantee the effect of the video file to have the professional
quality.
● Operating temperature: 0—40°C. For the extension of life, it is
best used at room temperature.
● Operating humidity: 20% -80%. This product does not have the waterproof
mode, it can not work under the humid environment.
● Shooting brightness: Do not expose the camera directly to strong
light, such as the sun light, to avoid damage to optical devices.
● Cleaning: Do not use it under the environment with high dust
density to avoid the contamination of camera lens or other components
Instructions: |
№ 1 |
№ 2 | № 3 |
|