SJCAM M10 Camera |
| | Home | User manual | M10 | |
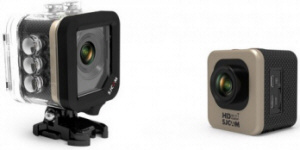 User manualThe M10 Series are designed for portability without compromises. Excellent resolution combined with the latest technologies, result in the finest user experience yet. Never look back, unless you have the M10 camera at your side.
External Lights The following lights indicate the operation described and can occur in several combinations. • Blue light on: the camera is on.
Buttons • Power/Mode: Press and release to turn on the camera. Press and release to change modes. Press and hold to turn off the camera. • Shutter/Select: Press to start or stop recording videos, take pictures, select menu items, or control video playback. • Up and Down: - Press and release to navigate through menus and change letters and numbers in Setup. - Press and hold to advance through several menu items in Setup. - Press and hold to zoom in or out in Record or Camera modes. - Press and release to fast forward or rewind videos du ring Playback.
Battery operations • Pull the battery cover latch to open the cover. • Charge the battery using only the provided battery charger, or by connecting it to a computer with a USB cable. You can also charge the battery using a car charger. It takes about 3 to 3-1/2 hours to fully charge a depleted battery.
Tip: If you are not using the camera for a prolonged period, remove the battery and store it in a dry and dark place, away from sunlight. Attention: Using other chargers than the one provided with the camera may damage the battery. If the battery is not charging when connected to a computer, make sure that the computer is powered on and try a different USB port, or cable. If the battery still has charging issues, please contact our technical support. Do not crush, pierce, drop, disassemble, or set fire to the battery, serious injuries may occur. Please dispose of the used battery, according to your local environmental regulations.
Working with memory cards The SJCAM M10 is compatible with microSD and microSDHC memory cards with capacity up to 32 GB. SJCAM recommends using a brand name memory card, preferably with a CLASS 10 rating, in order to have better performance and reliability.
• To insert the microSD card, gently slide it into the slot until it clicks into place. The microSD card can be inserted in one way only. If you have difficulties inserting the memory card, do not try to force it in, because it can be permanently damaged. Flip it over or face it the other way round and try again.
• To remove the microSD card, use your fingernail or some object with a thin tip and gently press the microSD card further into the camera body. You will hear a click, and the memory card will pop out of the camera body..
Attention: Be careful when handling memory cards. Avoid touching the connector pins, and keep them away from liquids, heat sources, dust and magnetic objects. Do not insert or remove the memory card while the camera is powered on. Consult the manufacturer’s specifications and guidelines concerning using the memory card in various or extreme weather conditions.
Battery Symbol • The battery charging symbol shows bars moving across a battery from left to right.
Video Record Mode Icons Icons appear only when OSD Mode is «On». If OSD Mode is turned off then no icons appear on the display except as indicated below.
When in default record mode, these icons are visible (starting at the top left corner):
• Yellow circle and numbers: Record mode selected. The yellow numbers are the remaining video recording time based on recording settings and available memory. If the yellow circle is flashing, switching between red and yellow, and red numbers counting up from 00:00:00 show the recording time for that segment. Yellow or red numbers are displayed shown in format HH:MM:SS.
• White letters and numbers in a blue box: video resolution and frames per second ( for example, 1080P30)
• White arrow loop with number: shows the Cyclic Record time segments.
• Microphone: audio recording is turned on.
• Flashing circle only switching between red and yellow (when OSD Mode turned off): the camera is recording video.
• Battery icon: indicates the approximate battery charge remaining. The icon has a plug symbol within the battery icon to indicate that the battery is turned off and charging, or that the camera is operating without a battery while connected to the charger.
• Time: shows current time in 24-hour clock, HH:MM:SS. Time resets to 00:00:00 when the battery is replaced.
• Date: shows current date in format YYYY-MM-DD. The date resets to default when the battery is replaced.
• Octagon with letter F: Motion Detection is turned «On».
• Key symbol: indicates the video is protected during Delete. CAUTION: this does not mean that the video will not be deleted if you perform a format on the memory card.
Camera Mode Icons Icons appear only when OSD Mode is «On». If OSD Mode is turned off then no icons appear on the display except as indicated below.
• Blue camera symbol: Camera mode active
• Number and letter: image size in megapixels (for example, 12M).
• Battery icon: indicates the approximate battery charge remaining. The icon has a plug symbol within the battery icon to indicate that the battery is turned off and charging,or that the camera is operating without a battery while connected to the charger.
• Number (max of six digits): the number of photos you can take at the selected camera settings with the available remaining memory.
• Yellow clock face with a number: Capture Mode with the selected time interval in seconds shown on the clock face. If the clock face is red with a number, then the camera is taking photos in Capture Mode at the time interval shown with the red numbers.
Playback Mode Icons Icons appear only when OSD Mode is «On». If OSD Mode is turned off then no icons appear on the display except as indicated below.
• Blue arrow: Playback mode.
• Red arrow: playback a video.
• Battery icon: indicates the approximate battery charge remaining. The icon has a plug symbol with in the battery icon to indicate that the battery is turned off and charging,or that the camera is operating without a battery while connected to the charger.
• White letters and numbers: displays the video resolution when reviewing video content(for example, 1080FHD for MOV files), or the image size ( for example, 2048X1536 for JPG files ) when reviewing image content.
• File name: a string of letters and numbers across the bottom of the display. The file name can look like this: - YY_MMDD_hhmmss_XXX.MOV - for non-protected videos; Abbreviations legend: YY = year, MM = month, DD = day, hh = hour, mm = minute, ss = seconds, XXX = file sequence number, EVE = protected video, MOV = video, JPG = photo.
• Key symbol: indicates the selected video is protected. If the OSD Mode turned off, a Start and Stop icon appears at the bottom of the screen. The red arrow icon appears when the «Shutter/Select» button is pressed to play back a video. The blue pause icon appears when the «Shutter/Select» button is pressed to pause video playback.
And Action The SJCAM M10 comes with several various modes. To browse through the modes, press the Power button repeatedly, until you find your desired mode. The default mode when you turn on the camera is the «Video Recording» mode. Pressing the Power button will guide you through the «Photo shooting», «Playback» and «Setup» modes. To select the mode, press the «Shutter/Select» button.
The 12MegaPixel Pro-Grade CMOS Sensor, along with the 170 degree Wide Angle lens, 4x Digital Zoom, Water Resistance of depths up to 30 meters, the Motion Detection sensor and the «Anti-Shake» Function will make sure you record every second of your adventure.
The camera can be operated without a battery if it is connected to an adapter. Note that the zoom is electronic, not optical. It operates by enlarging and cropping a recording or photo, not by adjusting lenses. Make sure you've installed an adequately charged battery and a memory card with sufficient remaining memory, before placing the camera in the waterproof housing.
Action in motion The M10 lets you capture video in high resolution 1080p at 30 fps (frames per second), by default. Other available video resolutions include 1280x720 at 60fps, 1280x720 at 30fps and 640x480 at 60fps. Use the «Settings» menu to choose your video recording preferences.
With SJCAM M10, you will be able to produce a time lapse video, without using a separate, third party device or software. Use the «Settings» menu to choose your time lapse preferences.
«Video recording» mode is the default mode when you turn the camera on. It is indicated by the camcorder symbol in the upper left corner of the status screen. In order to start recording, press the «Shutter/Select» button. To stop recording, press the «Shutter/Select» button again. The camcorder symbol on the status screen will disappear.
Pressing the Mode button while recording,will protect a video from accidental deletion.A key icon will appear on the display. Pressing and holding the «Up» button, will zoom in up to 4x. Pressing and holding the «Down» button will to zoom out.
• Attention: If your memory card is out of available space,or the battery is depleted,the camera will automatically stop recording.
Freeze the action With the M10 you will be able to capture high resolution 12MP images with superb quality and vivid colors. Turn on the camera and select the Photo Shooting mode. This mode is indicated by the camera symbol in the upper left corner of the status screen. Using the «Shutter/Select» button, you can choose between «Single Shot», «Self-Timer» and «Continuous (Burst)» shooting.
To capture images, press the «Shutter/ Select » button. If you are in the «Single Shot» mode, the camera will capture one frame. If you are in «Self-Timer» mode, the camera will capture an image with a delay of 3, 5 or 10 seconds, depending on your preferences. If you are in the «Continuous ( Burst )» mode, press the «Shutter/Select» button to capture consecutive images with a speed of 3, 5, 10 or 30 frames per second.This mode is great for capturing moving targets, like sport figures, animals, speeding objects etc. Pressing and holding the «Up» button, will zoom in up to 4x. Pressing and holding the «Down» button will to zoom out.
• Attention: If your memory card is out of available space, or the battery is depleted, the camera will prompt you that you will not be able to capture any images.
Replay the action There are several ways to review what you have captured, once you are done recording. You can connect the camera to a computer to transfer or playback the captured content. Also you can use the official mobile app ( available on Android and iOS ) to control your camera or playback the recorded content. In the end, you can remove the microSD card and use a card reader to transfer or playback the recorded content on it. The captured content is in industry standard .mov format for videos and .jpg format for images, so it can be easily reviewed without using complex or expensive software applications.
Press the «Mode» button until you reach the Playback menu. Press the «Down» button to advance to the next video or photo. Press and hold the «Down» button to scroll through several videos or photos at once. A thumbnail of each video and photo will appear. Press the «Shutter/Select» button for playback. The blue arrow icon changes to red. Press the «Shutter/Select» button again to pause the video playback. A blue pause symbol replaces the red arrow. Press the «Mode» button to stop playback. Press the «Up» button to go back to the previous video or photo.
While reviewing a video, pressing the «Down» button once will fast-forward (FF) at 2X speed, twice to speed up the playback at 4X, and if pressed once more, it will speed up the playback at 8X. Press the «Up» button during fast forward to decrease the speed of the playback by one step. Press the «Up» button once during playback to rewind at 2X speed, twice to rewind the playback at 4X, and if pressed once more, it will rewind the playback at speed of 8X. Press the «Down» button to reduce rewind speed by one step.
While reviewing photos, press the «Down» button to advance to the next photo.Press and hold the «Down» button to advance through several photos at once. Press the «Up» button to go back to the previous photo or video.
Refer to the TV-Out setting in the Setup Menu section below, to review recorded content using HDMI connection.
Car mode When used in this mode, the camera becomes an onboard camera that continuously records the view through a vehicle's windscreen.It may be attached to the interior windscreen or to the top of the dashboard, by suction cup or an adhesive-tape mount. Using the camera like this, may provide video evidence in the event of an accident.
In order to use the M10 in «Car Mode», press the «Mode» button until the «Setup» menu appears. Then, enter the «Setup» menu and navigate to Page 7, select «Car Mode», and then select «On». Plug the camera into a 12V adapter and plug the adapter into a 12V outlet in your vehicle. The camera can work in «Car Mode» with or without a battery in the camera. When you start your vehicle, the camera turns on and starts recording video automatically. When you shut off your vehicle it stops recording and turns off automatically. You can also turn off the camera manually while recording. «Camera» and «Playback» modes are disabled while recording in «Car Mode» and no setting can be changed. After the camera shuts down completely, you can then turn it on manually and operate it normally, provided that there is a battery in the camera.
Managing recorded content In order to transfer your recorded content to a computer, connect the camera to computer using a micro USB x USB cable. The camera will then turn on automatically and a dialog box on the camera display will ask whether to use the camera as a «Mass Storage» device or a PC Camera. Highlight «Mass Storage» and press the «Shutter/Select» button. A blue screen with the words «Mass Storage» will appear on the camera.
You can also remove the memory card and insert it into a card reader connected to your computer. Files are not automatically deleted when copied to a computer (unless you use the «Cut» command instead of «Copy»).
In order to delete selected videos and photos (except protected content), you can use one of the following two methods:
• In Playback mode navigate to a specific video or photo. Press and hold the «Up» button and then a «Delete» dialog box will appear with options: «Delete Current?», «Delete All?» or «Cancel». Select «Delete Current?», and when prompted «Erase This?» select «OK».
• In Playback mode navigate to the specific video or photo you want to delete. Press the Mode button to advance to the Setup menu and then highlight «Delete» on page 8 of the Setup menu and press the «Shutter/Select» button. A Delete dialog box appears with options: «Delete Current?» or «Delete All?». Highlight «Delete Current?» and press the «Shutter/Select» button, and when prompted «Erase This?», highlight «OK» and press the «Shutter/Select» button.
In order to delete all the recorded content, you can follow the same steps as above, and choose «Delete All?» instead of «Delete Current?». This will delete all the content, except the ones you have protected i.e. the ones that have the «key» icon. If you attempt to delete a protected video a blue pop-up appears with the word «Protected!». A message then appear across the screen and you will not be able to change modes using the Mode button until you have played the video for a moment.
In order to delete all the content on the memory card, including the protected videos or images, enter the «Setup» menu and navigate to page 8. Here you can select the «Format» option, that will format the memory card, effectively and irreversibly deleting all stored content. You can also format the memory card through the computer, but it is advisable to do so by using the camera.
SETUP MENUSCREEN
● Setup 1/9
• Resolution – It is the physical number of columns and rows of pixels that create the image and «fps» is the frame rate i.e. «Frames per Second» – which is a number, showing how many images will be displayed per second. Higher resolutions produce better quality, but consume the battery faster. Available options include: - 1080p (1920*1080)@ 30 fps - 720p (1280*720) @ 30/60 fps - WVGA (848*480)@ 60 fps - VGA (640*480) @ 60 fps
• Cyclic Record – A process of recording audio continuously to a storage medium. When the storage capacity is full, the recording process continues to record at the beginning, overwriting the previously recorded material and replacing it with the new content.
• HDR – High-dynamic-range imaging (HDR) is a technique used in imaging and photography to reproduce a greater dynamic range of luminosity than what is achievable with standard digital imaging or photographic techniques.
• Motion Detection – Motion detection is the process of detecting a change in the position of an object relative to its surroundings or a change in the surroundings relative to an object. It can be used to trigger the camera to start recording.
● Setup 2/9
• Audio – set up your audio preferences for video recording.
• Date Stamp – Information that identifies when a certain event occurred. When enabled, the date and time will be shown on your recorded content.
• Capture Mode - Single Shoot / Self-timer - take pictures immediately with «Single Shoot», or use «Self-timer» to capture an image with a delay of 3, 5, 10 or 20 seconds.
• Image Size – Choose the size of the photos. Available options include: - 12MP 4032×3024 - 10MP 3648×2736 - 8MP 3264×2448 - 5MP 2592×1944 - 3MP 2048×1536 - 2MP 1920x1080 - 1.3MP 1280×960 - VGA 640×480
● Setup 3/9
• Quality – Adjust the quality of the images. Available options include: «Fine», «Medium» and «Standard».
• Sharpness – describes the clarity of detail in a photo, and can be a valuable creative tool for emphasizing texture. Available options include: «Strong», «Normal» and «Soft».
• White Balance – or «WB” is the process of removing unrealistic color casts that affect the overall tone of the image, so that objects which are actually white in reality, are rendered as white in your photo, thus removing the color cast from a halogen lamp which makes everything in the photo a bit yellow, for example. Available options include: «Auto», «Daylight», «Cloudy», «Tungsten» and «Fluorescent».
• Color – Manipulate the color of the image, which may help you to achieve a stronger impact on the viewer. Available options include: «Color», «Black and White» and «Sepia».
● Setup 4/9
• ISO – as a term in the camera world, describes the camera’s film or sensor speed. The higher this number is, the more sensitive the camera is to light, which allows you to shoot under low-light conditions. But, the higher the number of the ISO, the more noise appears on the image, reducing the overall quality. Must be used with caution.
• Exposure – is the amount of light per unit area reaching a photographic film or electronic image sensor, as determined by shutter speed, lens aperture and scene luminance. Exposure is measured in lux seconds, and can be computed from exposure value (EV) and scene luminance in a specified region. Available values are: ± 2, ± 5/3, ± 4/3, ± 1, ± 2/3, ± 1/3, +0.
• Face Detection – is a computer technology i.e. and algorithm that is being used in a variety of applications that identifies human faces in digital images. Some recent digital cameras use face detection for autofocus.
• Anti-Shaking – Feature that effectively compensates for hand movement while taking pictures.
● Setup 5/9
• QuickReview
• DateStamp
• Language – Choose the menu display language. The list of available languages includes: English, French, German, Spanish, Italian, Portuguese, Simplified Chinese, Japanese, Traditional Chinese, Russian, Korean, Polish, Czech, Slovak, Hungarian, Danish, Dutch and Turkish.
• Date/Time – Adjust the time and date on the camera.
● Setup 6/9
• Auto Power Off – Option for automatic camera switch off. Available options include turning off after 3, 5 or 10 minutes of inactivity.
• Beep Sound – Turn the acoustic feedback sound when pressing the buttons on or off.
• TV out – Providing an analog video signal acceptable for a television AV input by connecting the camera and TV with USB cable.
• TV Mode – Switch between NTSC and PAL international video standards.
● Setup 7/9
• Screensavers – Set whether or not to turn off the screen after 30 seconds, 1, 3 or 5 minutes.
• Frequency – Option to set the frequency to 50 or 60 Hz.
• Rotate – When turned on, the screen and recorded content will be rotated.
• Car Mode – When used in this mode, the camera becomes an onboard camera that continuously records the view through a vehicle's windscreen. It may be attached to the interior windscreen or to the top of the dashboard, by suction cup or an adhesive-tape mount. Using the camera like this, may provide video evidence in the event of an accident.
● Setup 8/9
• OSD mode – On-screen display (OSD) is an image superimposed on a screen picture. When turned on, the date, battery status, resolution and some additional information are shown on the screen.
• License No set – An option to put your car’s license plate number in the recorded video.
• Delete – Delete video or image content from the memory card.
• Format – Format the memory card (Use with caution,this will erase all the data stored on the memory card!)
● Setup 9/9
• Default Setting – Reset the camera to factory settings.
• Version – Display the firmware version.
SJCAM M10 WIFI Action Camera● SJCAM M10 WiFi has a 12 mega pixel sensor for shooting crisp photos and recording amazing 1080P videos. The SJCAM M10 WiFi with high precision super wide angle lens provides superb image quality with vivid colors.
● The M10 Wifi has a user-friendly UI which can be navigated via its 1.5″ LTPS Screen. Control, Capture and Share photos & videos using your phone or tablet PC via WiFi. Many choices for M10 WiFi operation and Screen allows for M10 Wifi usage in every environment.
● SJCAM M10 WiFi has a wide 170 degree view for capturing pristine landscapes, sporting events, FPV aerial photography, Dash-cam usage and just fun Selfie photos.
● SJCAM M10 WiFi Action Camera has full HD resolution recording at 1920×1080. Wide Dynamic Range (WDR) allows you to Capture warm and vivid Picturesque scenes with the M10 WiFi.
● Dive up to 30 Meters with the newly designed SJCAM Waterproof Case. The M10 Series waterproof case was re-designed to have 3 buttons on the side for easier navigation under water or while camera is mounted inside case.
● The SJCAM M10 Wifi one of the most compact Action Cams on the market. Packing in 1080P video record, HDMI-out, WiFi and countless other features inside a compact cube was not easy.
● Capture up to 3 photos per second with the M10 WiFi Burst Mode function. This feature is most used by X-game enthusiasts, and people who like shooting photos of sporting events, animals and capturing other fast moving targets.
● SJCAM M10 are able to utilize Time lapse video recording without the use of separate time consuming editing software. Time lapse video mode is a creative recording technique which produce time lapse video automatically.
● The SJCAM M10 WiFi has digital anti-shake which effectively compensates for hand movement while taking pictures.
SJCAM M10 WIFI Main Features • Mini appearance diversified colors available
Specification: • Display (LCD) 1.5 Inch |
| • GF-07 • A9 • SQ11 WIFI • SQ11 • TK905 • XD • Mini A8 • Q7 • GF-09 • SQ10 • SQ8 • GF-21 • 70mai • MD81S-6 • MD80 • T189 • SQ16 • 70mai Pro • SQ13 • A10 • SQ23 • iMiniCam • TK921 • U21 • HERO6 • HERO5 • A10 • SQ9 • SQ12 • X009 • GT300 • Mi 4k • R3 • Mini DV • SJ7 • M10 • |
| | EN | DA | NL | JA | RU | |
| m10 wi-fi camera |
|---|
| © «Org-Info.Mobi» |