Mini video camera DV135S |
| | Home | User manual | DV135S | |
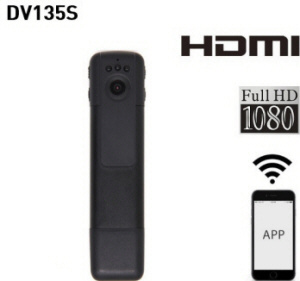
WI-FI Mini DV camera DV135SThe body of the micro camera is made of a combination of durable plastic and metal, which allowed to place the center of gravity directly in the middle of the case, and a convenient clip, will help you easily fix the mini DVR on clothes. Built-in lithium polymer battery 560mAh provides up to 1.5 hours of continuous operation, the HDMI connector allows you to view the recorded video directly on your home TV, and the presence of activation of recording on the motion sensor - record only those moments when something is happening in the room and at the same time save Charge the battery and place on the memory card. A wide-angle lens with a viewing angle of 170 °, a powerful invisible nightlight that provides excellent visibility even in total darkness up to 5 meters, and long-awaited recording functions during charging and cyclic recording (which makes it possible to use the camera around the clock). Mini DV camera DV135S combines the usual hidden camera and wireless Wi-Fi video camera, which means that you can connect to it remotely with free applications for iOS and Android.
DV135S Specifications
1. Recording of color video with sound with a resolution of 1920x1080 @ 30fps or 1280x720 @ 60fps
DV135S VIDEO CAMERA CONTROLS
A. Power / Confirm key «Power»
Instruction manual for DVR Ambertek DV135S
NOTE. Before using the new MicroSD memory card for the first time, you must format it.
1. Insert the MicroSD memory card.
NOTE: This camcorder records video in high resolution without using interpolation and other artificial methods to increase the resolution, so we recommend using high-speed memory cards of grade 10 or higher.
CHARGING THE CAMCORDER Attention! You must fully charge the camera battery before using it for the first time!
Connect the camcorder to the power supply or to the USB port of the computer using the supplied cable. During charging, both red and blue indicators will be lit simultaneously. When the charging is completed, the red light will stop and the blue light will be on.
RECORDING VIDEO 1. Press the «Power» button once to turn on the camcorder - the camcorder will go into standby mode - the blue LED will light up constantly. To start recording, press the «Power» button again - the indicator will blink 5 times and go out - the process of recording video is in progress. By default, the camera works in the video recording mode with a resolution of 1080p and saves the recorded video every 10 minutes. 2. To stop recording and save the video, press the «Power» button, and the camera will enter standby mode. To turn off the camcorder, press and hold the «Power» button for 3 seconds.
Note: You can change the frequency of saving and allowing video recording using applications or special settings settings (see Next).
SHOOTING PHOTOS 1. Press the «Power» button once to turn on the camcorder - the camcorder will go into standby mode - the blue LED will light up constantly. 2. Press the «Mode» button once to switch to the photo shooting mode - the blue indicator turns off and the red indicator turns off. 3. Press the «Power» button once to shoot and save the photo - the red LED will blink - the photo has been successfully saved.
DICTOFON MODE 1. Press the «Power» button once to turn on the camcorder - the camcorder will go into standby mode - the blue LED will light up constantly. 2. To enter the recorder mode, press the «Mode» button twice - blue and the red LEDs turn off and the green indicator will light up. 3. To start recording, press the «Power» button - the green indicator will blink during recording, the sound recording will be automatically saved every 30 minutes. To stop recording and save the recording, press the «Power» button again.
RECORDING MOTION SENSOR 1. Press the «Power» button once to turn on the camera - the camcorder will go into standby mode - the blue LED will stay on. 2. To enter the shooting mode using the motion sensor, press the «Mode» button three times - the blue and red indicators will light simultaneously. 3. To activate the motion sensor, press the «Power» button - blue and red indicators blink 5 times and turn off. To turn off motion sensor recording, press the «Power» button again.
WI-FI CONNECTION 1. In any mode, press the «Wi-Fi» button once, the blue and green indicators will blink slowly, the camcorder is waiting for connection via Wi-Fi. As soon as you connect to the camcorder using the application - the blue and green LED indicators will light constantly. 2. Install on your smartphone or tablet a free application: for «Android» or for «iOS». Also, you can find application data in the Android Play Market or Appstore under the name «Finalcam». 3. In the list of Wi-Fi networks, locate the network created by the wireless video camera. By default, the name of the Wi-Fi network created by the camera is «C11». The default password is «12345678». 4. Open the installed application and use the DV135S camcorder remotely! 5. To disconnect the Wi-Fi module - press the «Wi-Fi» power button once.
CONNECTION AND RECORDING VIDEO ON PC WI-FI 1. Press the «Power» button once to turn on the camera - the camcorder will go into standby mode - the blue LED will stay on. 2. Press the «Wi-Fi» button once, the blue and green indicators will blink slowly, the camcorder is waiting for Wi-Fi connection. 3. Connect from your PC to the device's Wi-Fi network: network «C11», password «12345678» (default). 4. A «VLC media player» should be installed on the computer. In the Open URL dialog, enter rtsp: //192.168.1.254/sjcam.mov 5. The video opens. Through the context menu, you can turn the recording on and off.
NIGHT LIGHTS 1. In any mode, press the button once to turn on the night illumination - as a confirmation of turning on the backlight the red indicator will blink 3 times. 2. To turn off, press the ON / OFF button once to turn off the night illumination - the green light will blink 3 times as confirmation of turning off the night illumination.
CHANGING PARAMETERS WITH THE FILES OF SETTINGS 1. The DV135S camcorder can record video in 4 resolutions:
In order to set the required resolution, create in the root directory a file named «moviesizeset.txt» and specify the value of the parameter in it:
2. Using the settings files, you can set the date and time displayed in the bottom corner of the recorded video:
3. The DV135S camera can take photos in 4 resolutions: 4032x3024, 2034x1536, 1920x1080 and 1280x720. In order to set the required resolution for photos, you need to create a file named «photosizeset.txt» in the root directory and specify the value of the parameter in it:
CONNECTING TO HDMI You can connect this DV135S wireless camera to a TV or any other device that has an HDMI input. After connection, use the «Mode» button to change the modes. In the modes of video recording, photo shooting, voice recording, use the «Power» button to start recording or shooting a photo. In the playback mode, use the «Wi-Fi» button to select the movie, and the «Power» button to start and stop playback. |
| • GF-07 • A9 • SQ11 WIFI • SQ11 • TK905 • XD • Mini A8 • Q7 • GF-09 • SQ10 • SQ8 • GF-21 • 70mai • MD81S-6 • MD80 • T189 • SQ16 • 70mai Pro • SQ13 • A10 • SQ23 • iMiniCam • TK921 • U21 • HERO6 • HERO5 • A10 • SQ9 • SQ12 • X009 • GT300 • Mi 4k • R3 • Mini DV • SJ7 • M10 • DV135S • |
| | EN | DE | FR | RU | |
| dv135s wi-fi mini dv |
|---|
| © «Org-Info.Mobi» |
